This page will show you how to upload images to Oakland Wiki and create a page for them. We will be using murals of Oakland for the Nov. 10 Oakland Wiki Bikeabout event as the example.
To upload images to Oakland Wiki, you have to first create an entry for the image and then upload the image.
Create a Page
In order to create a new page, the first thing you should do is to search to make sure your idea for a page doesn't already exist. This is very important to prevent duplication of content by multiple people. On each page in the wiki, there is a search box on the top right of the page with a Search or create page button:

- Enter text into the search box related to the content you want to create. For example, if you wanted to create an entry about the Water Writes mural on Broadway and 21st St. downtown, you would search "Water Writes mural."
- Click on the Search or create page button.
- You will be presented with a page with the results of your query. If there is an exact match to your search, you will receive a link or links to the content that matches your search query. If there is no exact match, you will be presented with a message to this effect, and a button to Create this page.
- Click on the Create this page to enter editing mode for your new page. To learn how to edit your new page's content, check out the guide to Editing Content. You will need to save your changes on your new page for the page to be permanently saved on the wiki.
(the above is modified from the Localwiki Usage Guide)
Upload an Image
Once you've created the page, you can add text, images, maps, and tags. This is how to add an image:
1. On the editing dashboard, click the "Add Image" button:
2. Choose the file from your computer.
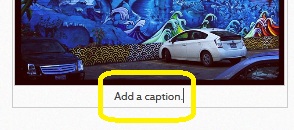
3. Once the image is uploaded, click on the bottom of the image to add a caption (make sure to credit the person who took the photo!):
4. Now you're done! When you're done editing the page, click "Save Changes."
Now that you have a page with an image, you can add text, a map, and tags (we encourage you to tag all mural entries "mural" so that they appear on this page of murals in )! To add a map, click "Create a map" at the top of the screen (more detailed instructions here):
To add tags, click the "add tags" button at the bottom of the screen (more detailed instructions here):
That's it! Here is what a complete mural entry looks like with a photograph, a tag, and a map!
More Info:
If you use instagram, we encourage you to use i-am-cc.org to add CC-BY licenses to your instagram photos, allowing anyone to use, re-use, and modify your photos (as long as you're credited!). Tag your photos #oaklandwiki!
Many file formats are accepted (jpg, gif, png, etc.) on Oakland Wiki!


